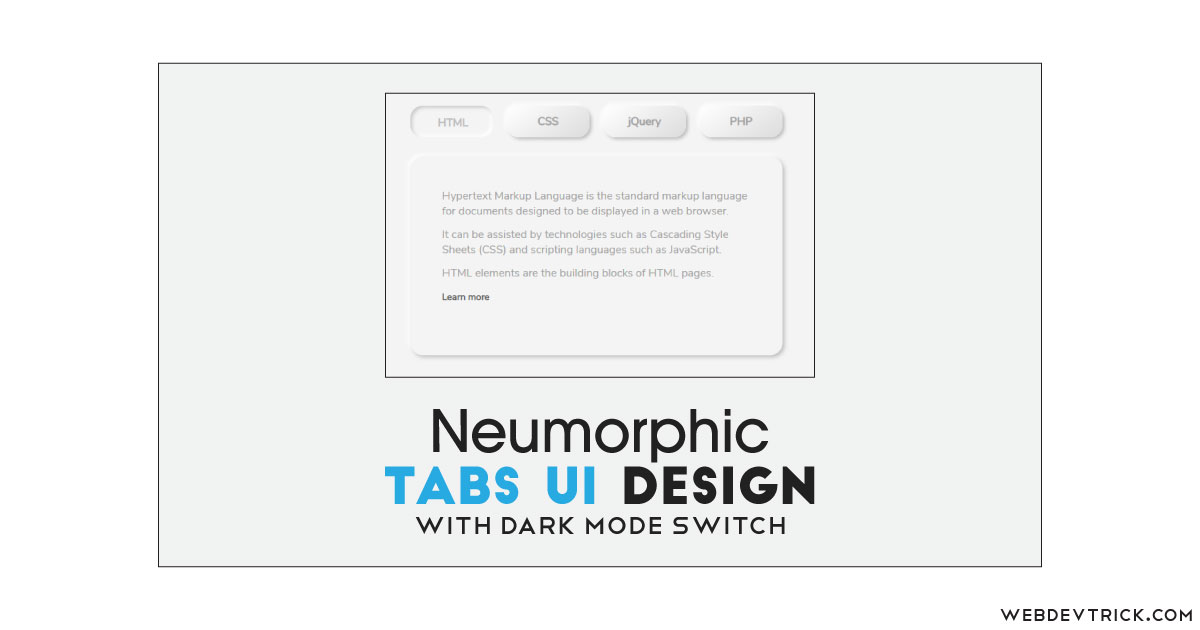
How we can create a tabs program with nemorphism or soft UI design? Solution: See this Neumorphic Tabs Design With Dark Mode Switch, Neumorphism / Soft UI.
Previously I have shared some tabs programs, but this is a neumorphic tab with attractive UI design. Basically, Neumorphic UI designs pretend to extrude from the background. It’s a raised shape made from the exact same material as the background. It has light and dark shadow combinations to visualize differences from the background. And this is the new trend in web or UI design, it looks pretty and attractive.
Today you will learn to create Neumorphism or Soft UI based tabs program. Basically, there are tabs with 4 items ( navigation with content ) and the navigations are at the top and the content card is below the navigations. Each item contains their own texts, when you will click on another tab item the text will change. Also, there is a dark and light mode toggle button to change the design to dark mode. These two types of design (light/dark) contains border and two types of shadows combination for neumorphic design.
So, Today I am sharing Neumorphic Tabs Design With Dark Mode Switch. The neumophic design is based on CSS and the dark mode switch is based on JavaScript. There I have not used any library for styling or functioning, like any JS library or CSS library. You can use this program on your website or web app because it looks good.
If you are thinking now how this unique tabs program actually is, then see the preview given below.
Preview Of Tabs with Neumorphism or Soft UI
See this video preview to getting an idea of how this tabs design looks like.
Now you can see this UI design visually, also you can see it live by pressing the button given above. If you like this, then get the source code of its.
You May Also Like:
- Segmented Control Interaction
- Form UI Validation Animation
- Color Cross Text Reveal
- Parallax Error 404 Page
Neumorphic Tabs Design With Dark Mode Switch Source Code
Before sharing source code, let’s talk about it. First I have created the main div with class and ID name ‘container’ and placed all other elements inside it. Inside the main div, I have placed two divs sections, one for tab navigation and items, and another for dark mode switch. In the tabs navigation and text I have placed an ID and class names. Also in the HTML file, I have linked other files like CSS and JavaScript.
Now using CSS I have placed all the items in the right place, as you can see in the preview. There I have used background color and box-shadow combination to creating the neumorphic design. There CSS box-shadow: command is mostly used for creating the UI. This program is not fully responsive, but I have decreased the sizes of some elements to open is a small screen.
JavaScript handling here the toggle feature for dark and light mode in this program. JS adding and removing CSS class names according to actions for changing the style. There I have used addEventListener command to detect actions or changes and declared conditions. Left all other things you will understand easily after getting the codes, I can’t explain all in writing.
For creating this program, you have to create 3 files. First file for HTML, second for CSS, and the third file for JavaScript. Follow the steps to creating this without any error.
index.html
Create an HTML file named ‘index.html‘ and put these codes given below.
|
1 2 3 4 5 6 7 8 9 10 11 12 13 14 15 16 17 18 19 20 21 22 23 24 25 26 27 28 29 30 31 32 33 34 35 36 37 38 39 40 41 42 43 44 45 46 47 48 49 50 51 52 53 54 55 56 57 58 59 60 61 62 63 64 |
<!DOCTYPE html> <!--Code By Webdevtrick ( https://webdevtrick.com )--> <html lang="en" > <head> <meta charset="UTF-8"> <title>Neumorphic Tabs | Webdevtrick.com</title> <link rel="stylesheet" href="style.css"> </head> <body> <div id="container" class="container"> <div id="tabs" class="Tcontainer"> <div class="tabs"> <a id="tab1" data-tab="1" class="tab">HTML</a> <a id="tab2" data-tab="2" class="tab">CSS</a> <a id="tab3" data-tab="3" class="tab">jQuery</a> <a id="tab4" data-tab="4" class="tab">PHP</a> </div> <div class="content"> <div id="Tcontent1" data-tab="1" class="Tcontent"> <p>Hypertext Markup Language is the standard markup language for documents designed to be displayed in a web browser.</p> <p>It can be assisted by technologies such as Cascading Style Sheets (CSS) and scripting languages such as JavaScript.</p> <p>HTML elements are the building blocks of HTML pages.</p> <p class="read-more-link"><a href="#">Learn more</a></p> </div> <div id="Tcontent2" data-tab="2" class="Tcontent"> <p>Cascading Style Sheets (CSS) is a style sheet language used for describing the presentation of a document written in a markup language like HTML.</p> <p>CSS is a cornerstone technology of the World Wide Web, alongside HTML and JavaScript.</p> <p>The CSS specifications are maintained by the World Wide Web Consortium (W3C).</p> <p class="read-more-link"><a href="#">Learn more</a></p> </div> <div id="Tcontent3" data-tab="3" class="Tcontent"> <p>jQuery is a JavaScript library designed to simplify HTML DOM tree traversal and manipulation, as well as event handling, CSS animation, and Ajax.</p> <p>It is free, open-source software using the permissive MIT License. As of May 2019, jQuery is used by 73% of the 10 million most popular websites.</p> <p>jQuery's syntax is designed to make it easier to navigate a document.</p> <p class="read-more-link"><a href="#">Learn more</a></p> </div> <div id="Tcontent4" data-tab="4" class="Tcontent"> <p>PHP is a popular general-purpose scripting language that is especially suited to web development.</p> <p>It was originally created by Rasmus Lerdorf in 1994; the PHP reference implementation is now produced by The PHP Group.</p> <p>The standard PHP interpreter, powered by the Zend Engine, is free software released under the PHP License.</p> <p class="read-more-link"><a href="#">Learn more</a></p> </div> </div> </div> <div class="DarkModeSW"> <label class="switch-label" for="DarkModeSW">Dark mode</label> <label class="switch"> <input type="checkbox" id="DarkModeSW"> <span class="slider round"></span> </label> </div> </div> <script src="function.js"></script> </body> </html> |
style.css
Now create a CSS file named ‘style.css‘ and put these codes given here.
|
1 2 3 4 5 6 7 8 9 10 11 12 13 14 15 16 17 18 19 20 21 22 23 24 25 26 27 28 29 30 31 32 33 34 35 36 37 38 39 40 41 42 43 44 45 46 47 48 49 50 51 52 53 54 55 56 57 58 59 60 61 62 63 64 65 66 67 68 69 70 71 72 73 74 75 76 77 78 79 80 81 82 83 84 85 86 87 88 89 90 91 92 93 94 95 96 97 98 99 100 101 102 103 104 105 106 107 108 109 110 111 112 113 114 115 116 117 118 119 120 121 122 123 124 125 126 127 128 129 130 131 132 133 134 135 136 137 138 139 140 141 142 143 144 145 146 147 148 149 150 151 152 153 154 155 156 157 158 159 160 161 162 163 164 165 166 167 168 169 170 171 172 173 174 175 176 177 178 179 180 181 182 183 184 185 |
/* Code By Webdevtrick ( https://webdevtrick.com ) */ @import url(https://fonts.googleapis.com/css?family=Nunito+Sans); * { box-sizing: border-box; margin: 0; padding: 0; } .container { display: flex; height: 100vh; background-color: #f4f4f4; color: #a2a2a2; font-family: "Nunito Sans", Arial, Helvetica, sans-serif; } .darkmode .container { background-color: #1A1B1F; color: #8a8a8a; } .Tcontainer { width: 540px; max-width: 620px; min-width: 420px; margin: auto; } .tabs { margin-bottom: 28px; display: flex; justify-content: space-between; } .tabs a { cursor: pointer; padding: 12px 24px; width: 120px; text-align: center; font-weight: bold; border-radius: 18px; transition: background 0.1s, color 0.1s; background: linear-gradient(145deg, #ffffff, #dcdcdc); box-shadow: 3px 3px 5px #bebebe, -3px -3px 5px #ffffff; } .darkmode .tabs a { background: linear-gradient(145deg, #1c1d21, #17181c); box-shadow: 3px 3px 6px #101114, -3px -3px 6px #24252a; } .tabs a:hover { background: linear-gradient(145deg, #f4f4f4, #cecece); color: #888; } .darkmode .tabs a:hover { background: #141414; color: #bbb; } .tabs a.active { background-color: #f4f4f4; color: #bdbdbd; cursor: default; padding: 14px 22px 10px 26px; background: #f4f4f4; box-shadow: inset 3px 3px 5px #cbcbcb, inset -3px -3px 5px #ffffff; } .darkmode .tabs a.active { background: #1A1B1F; box-shadow: inset 3px 3px 6px #101114, inset -3px -3px 6px #24252a; color: #6a6a6a; } .Tcontent { padding: 46px; min-height: 288px; display: none; border-radius: 18px; background: #f4f4f4; box-shadow: 3px 3px 6px #bebebe, -3px -3px 6px #ffffff; } .darkmode .Tcontent { background: linear-gradient(145deg, #1c1d21, #17181c); box-shadow: 3px 3px 6px #101114, -3px -3px 6px #24252a; } .content .active { display: block; } .Tcontent p { margin-bottom: 12px; } .Tcontent p:last-child { margin-bottom: 0; } .Tcontent .read-more-link a { color: #626262; text-decoration: none; font-size: 0.85em; font-weight: bold; } .darkmode .Tcontent .read-more-link a { color: #d4d4d4; } .DarkModeSW { position: absolute; top: 16px; right: 16px; } .DarkModeSW .switch { /* margin-left: 4px; */ } .switch-label { cursor: pointer; font-size: 0.85em; } .switch { position: relative; display: inline-block; width: 44px; height: 22px; margin-left: 4px; } .switch input { opacity: 0; width: 0; height: 0; } .slider { position: absolute; cursor: pointer; top: 0; left: 0; right: 0; bottom: 0; background-color: #1A1B1F; transition: .2s; box-shadow: 2px 2px 3px #ffffff, -2px -2px 3px #bebebe; } .darkmode .slider { box-shadow: 2px 2px 3px #34353a, -2px -2px 3px #000104; } .slider:before { position: absolute; content: ""; height: 18px; width: 18px; left: 3px; bottom: 2px; background: #9294b8; -webkit-transition: .4s; transition: .4s; } input:checked + .slider { background-color: #f4f4f4; } input:checked + .slider:before { transform: translateX(21px); } .slider.round { border-radius: 11px; } .slider.round:before { border-radius: 50%; } @media (max-width: 650px) { .Tcontainer { width: 100%; } .tabs { display: block; } .tabs a { width: 70px; } .Tcontent { padding: 15px; } } |
function.js
The final step, create a JavaScript file named ‘function.js‘ and put the codes.
|
1 2 3 4 5 6 7 8 9 10 11 12 13 14 15 16 17 18 19 20 21 22 23 24 25 26 27 28 29 30 31 32 33 34 35 36 37 38 39 40 41 42 43 |
// Code By Webdevtrick ( https://webdevtrick.com ) const tabs = document.querySelectorAll('.tab') const Tcontents = document.querySelectorAll('.Tcontent') const darkModeSwitch = document.querySelector('#DarkModeSW') const activateTab = tabnum => { tabs.forEach( tab => { tab.classList.remove('active') }) Tcontents.forEach( Tcontent => { Tcontent.classList.remove('active') }) document.querySelector('#tab' + tabnum).classList.add('active') document.querySelector('#Tcontent' + tabnum).classList.add('active') localStorage.setItem('jstabs-opentab', JSON.stringify(tabnum)) } tabs.forEach(tab => { tab.addEventListener('click', () => { activateTab(tab.dataset.tab) }) }) darkModeSwitch.addEventListener('change', () => { document.querySelector('body').classList.toggle('darkmode') localStorage.setItem('jstabs-darkmode', JSON.stringify(!darkmode)) }) let darkmode = JSON.parse(localStorage.getItem('jstabs-darkmode')) const opentab = JSON.parse(localStorage.getItem('jstabs-opentab')) || '3' if (darkmode === null) { darkmode = window.matchMedia("(prefers-color-scheme: dark)").matches } if (darkmode) { document.querySelector('body').classList.add('darkmode') document.querySelector('#DarkModeSW').checked = 'checked' } activateTab(opentab) |
That’s It. Now you have successfully created Neumorphic Tabs Design With Dark Mode Switch, Neumorphism or Soft UI design. If you have any doubt or question comment down below.
Thanks For Visiting, Keep Visiting.


Cool code! One question tho, how can I make it default to the dark theme? Thanks!