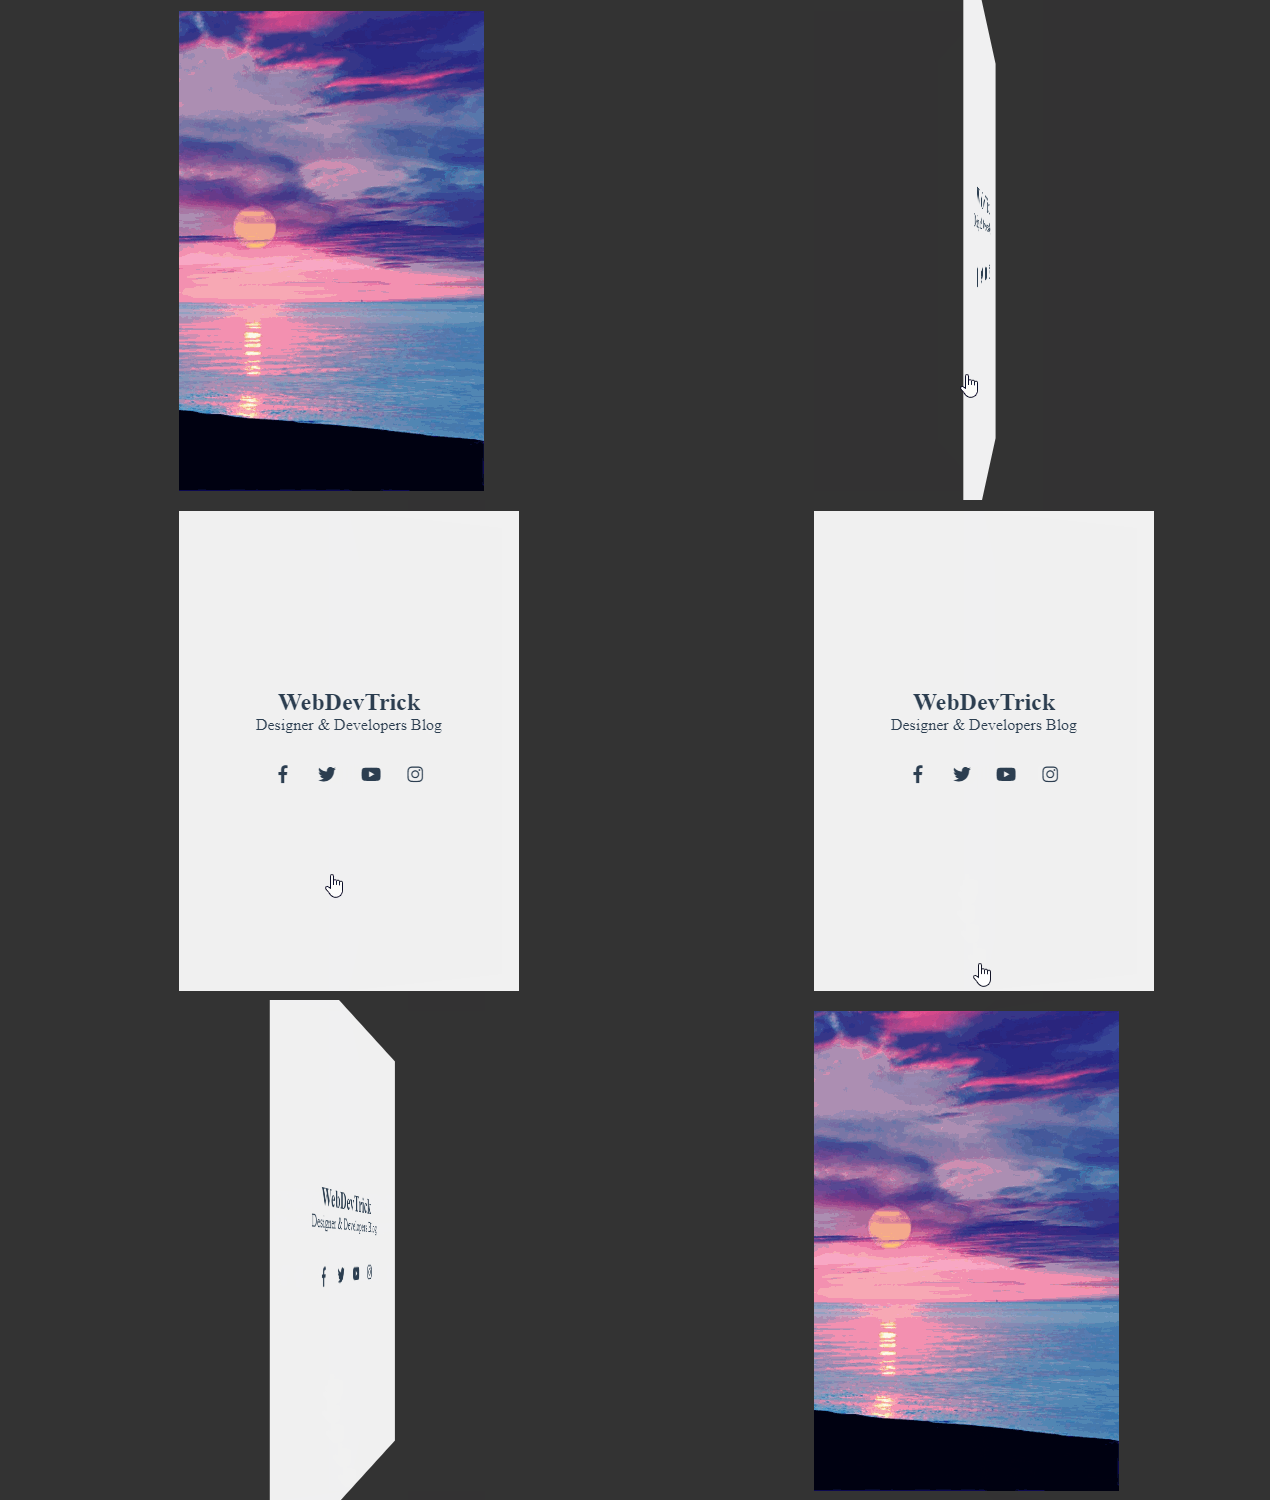
CSS Flip Effect On Hover | 3D Flip Effect With HTML & CSS: You have seen lots of CSS 3D flip effects on many websites. Mostly they use this effect on Portfolio & Team Member section. First, you will see an image & when you hover over on it, then the image will turn and will give information about it. And the transformation of image to text details look like a 3D effect.
You don’t have any idea about what you can do with HTML & CSS. Peoples think these are basics of web development. In other words, they think HTML & CSS is very easy. Yes, It is but unless you don’t know about the latest version of these HTML5 & CSS3 features. Very few peoples can say, I am an expert in HTML, CSS. Most people know about it as much as they use it daily.
This article helps you to create a 3D flip effect on mouse hover with CSS. You can create it by CSS’s commandtransform. The property transform applies a 2D or 3D transformation to an element. This property allows you to rotate, scale, move, skew, etc. (know more about CSS transform ).
3D CSS Flip Effect On Mouse Hover Source Code
Let’s create a 3D flip box with CSS3. You can create an amazing flip effect with this source code. Previously I had shared CSS link hover effect as I use in my blogs links. If you want more CSS stuff then go to my CSS Category. So, let’s talk about this program: This program created in HTML, CSS & Font Awesome ( a web font-family ). Basically, I use font-awesome for built-in cool icons. I had created 2 files for this program one for html other for css styling. This program is about to rotate any object on mouse hover. Let’s see a preview:

Now create two files named index.html ( or any name you can use ) & another one for giving style named style.css
index.html
Create a file named index.html and put these codes given here below.
|
1 2 3 4 5 6 7 8 9 10 11 12 13 14 15 16 17 18 19 20 21 22 23 24 25 26 27 28 29 30 31 32 33 |
<!DOCTYPE html> <!-- code by webdevtrick (https://webdevtrick.com) --> <html lang="en" dir="ltr"> <head> <meta charset="utf-8"> <title></title> <link rel="stylesheet" href="style.css"> <link rel="stylesheet" href="https://use.fontawesome.com/releases/v5.3.1/css/all.css"> </head> <body> <div class="card middle"> <div class="front"> <img src="sample.jpg" alt=""> </div> <div class="back"> <div class="back-content middle"> <h2>WebDevTrick</h2> <span>Designer & Developers Blog</span> <div class="sm"> <a href="#"><i class="fab fa-facebook-f"></i></a> <a href="#"><i class="fab fa-twitter"></i></a> <a href="#"><i class="fab fa-youtube"></i></a> <a href="#"><i class="fab fa-instagram"></i></a> </div> </div> </div> </div> </body> </html> |
style.css
Now create a file named style.css for giving effect this program.
|
1 2 3 4 5 6 7 8 9 10 11 12 13 14 15 16 17 18 19 20 21 22 23 24 25 26 27 28 29 30 31 32 33 34 35 36 37 38 39 40 41 42 43 44 45 46 47 48 49 50 51 52 53 54 55 56 57 58 59 60 61 62 63 64 65 66 67 68 69 |
/** code by webdevtrick (https://webdevtrick.com) **/ *{ margin: 0; padding: 0; text-decoration: none; font-family: "montserrat"; } body{ background: #333; } .middle{ position: absolute; top: 50%; left: 50%; transform: translate(-50%,-50%); } .card{ cursor: pointer; width: 340px; height: 480px; } .front,.back{ width: 100%; height: 100%; overflow: hidden; backface-visibility: hidden; position: absolute; transition: transform .6s linear; } .front img{ height: 100%; } .front{ transform: perspective(600px) rotateY(0deg); } .back{ background: #f1f1f1; transform: perspective(600px) rotateY(180deg); } .back-content{ color: #2c3e50; text-align: center; width: 100%; } .sm{ margin: 20px 0; } .sm a{ display: inline-flex; width: 40px; height: 40px; justify-content: center; align-items: center; color: #2c3e50; font-size: 18px; transition: 0.4s; border-radius: 50% } .sm a:hover{ background: #2c3e50; color: white; } .card:hover > .front{ transform: perspective(600px) rotateY(-180deg); } .card:hover > .back{ transform: perspective(600px) rotateY(0deg); } |
That’s It. Now you have successfully created a rotating flip effect on mouse hover. If you have any doubt comment down below.
Thanks For Visiting, Keep Visiting.


Thanks a million for these tutorial. But I have one question: tell me why you use :
*{
…..
};
Why?
* { …. } is for select all elements.
Super cul
thank you
Hello,
Thank you for this tutorial, it saves my life. However, I’m having a problem with the Safari browser.
The image (backgrond .font) is not displayed but the text has a mirror effect. So I only have the face part .back
Thank you very much for your comment. Stay connected.
Thanks i’m waiting you 🙂
add -webkit- before all css properties
Thank you !!!
Amazing man, could you please describe perspective property.
Sure, I will post on this topic soon.
thanks a lot!
Excellent post. I’m experiencing some of these issues as well..
I’m having a issue in FireFox the card flips but I don’t see the ‘back’ side?