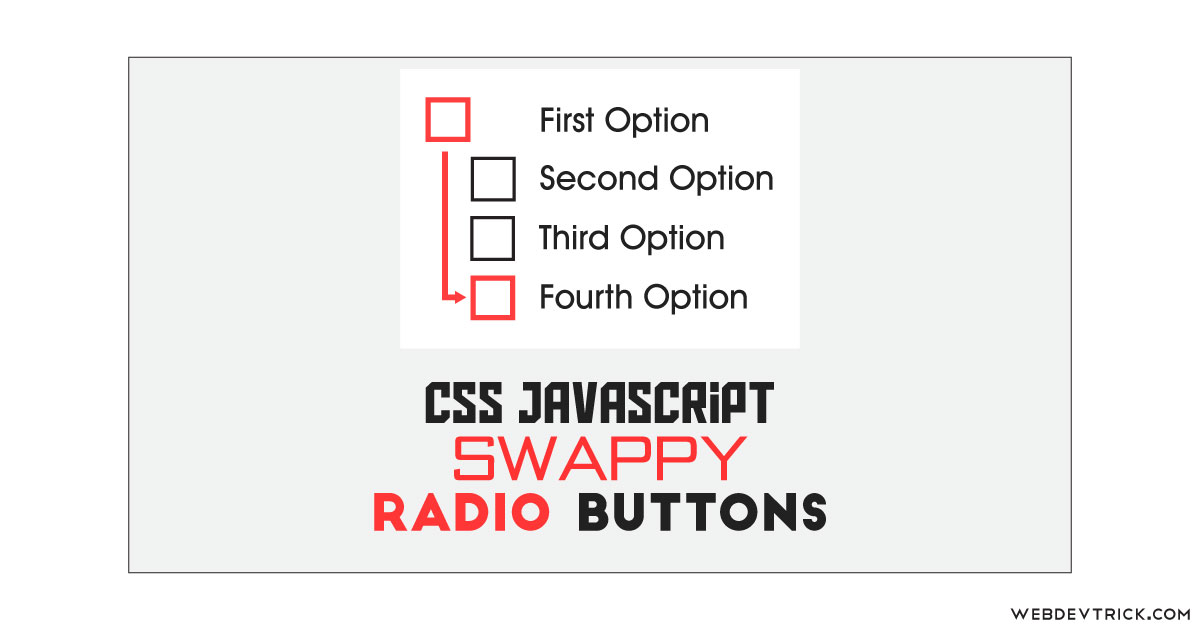
How we can create custom and unique radio buttons using HTML CSS JavaScript? Solution: See this Swappy Radio Buttons With CSS and JavaScript, Custom Radio Input Animation.
Previously I have shared some radio input programs, but this program is with a unique swappy effect switch. Basically, HTML <input> elements of type radio are generally used in radio groups—collections of radio buttons describing or select options. Only one radio button in a given group can be selected at the same time. By default, it comes with basic black and white small circles, but we can modify the style using CSS and JS.
Today you will learn to create a unique Radio Input select Animation. Basically, there are 5 radio inputs or options with customized buttons. By default, the first option is selected and the selected button has a tomato-red border. When you will select any other option then the active button will shift to that position. First, the button will go out of position on the left and it will shift to up or down according to action.
So, Today I am sharing Swappy Radio Buttons With CSS and JavaScript. There I have used CSS for styling and JavaScript for functioning, there is no jQuery or any other library. You can call this a pure CSS and JavaScript program for customizing radio input or buttons. You can use this radio button group on your project or website.
If you are thinking now how these radio inputs actually are, then see the preview given below.
Preview Of Unique Radio Input Animation
See this video preview to getting an idea of how this radio button animation looks like.
Now you can see this visually, also you can see it live by pressing the button given above. If you like this, then get the source code of its.
You May Also Like:
Swappy Radio Buttons With CSS and JavaScript Source Code
Before sharing source code, let’s talk about it. First I have created a main div and put 5 label tags inside it. Inside the label tag, I have placed a radio input, a span with a class name, and another span with text like the first option, the second option, etc. Also In the HTML file, I have linked other files like CSS and JS.
Now using CSS I have placed all the elements in the right place, as you can see in the preview. There I have used flex display and CSS position for placing the elements. With CSS I have done basic works like size, position, margin, padding, etc. Also, I have used CSS :checked command for styling the active radio button.
JavaScript handling here the main feature of the program, which is a little tricky and complicated. First JS fetched the data using document.querySelector command and stored in conts. Basically, there JavaScript modifying the CSS values according to action, not only class name it changing the whole values of animation, position, etc.
Left all other things you will understand after getting the codes, I can’t explain all in writing because the JS codes are a little bit harder. For creating this program you have to create 3 files. First file for HTML, second for CSS, and the third file for JavaScript. Follow the steps to creating this without any error.
index.html
Create an HTML file named ‘index.html‘ and put these codes given below.
|
1 2 3 4 5 6 7 8 9 10 11 12 13 14 15 16 17 18 19 20 21 22 23 24 25 26 27 28 29 30 31 32 33 34 35 36 37 38 39 40 41 42 43 44 45 |
<!DOCTYPE html> <html lang="en" > <head> <meta charset="UTF-8"> <title>Swappy Radio Inputs | Webdevtrick.com</title> <link href="https://fonts.googleapis.com/css?family=Lato:400,700" rel="stylesheet"> <link rel="stylesheet" href="https://cdnjs.cloudflare.com/ajax/libs/normalize/5.0.0/normalize.min.css"> <link rel="stylesheet" href="style.css"> </head> <body> <div class="swappy-radios" role="radiogroup" aria-labelledby="swappy-radios-label"> <h3 id="swappy-radios-label">Select An Option</h3> <label> <input type="radio" name="options" checked /> <span class="radio"></span> <span>First Option</span> </label> <label> <input type="radio" name="options" /> <span class="radio"></span> <span>Second Option</span> </label> <label> <input type="radio" name="options" /> <span class="radio"></span> <span>Third Option</span> </label> <label> <input type="radio" name="options" /> <span class="radio"></span> <span>Fourth Option</span> </label> <label> <input type="radio" name="options" /> <span class="radio"></span> <span>Fifth Option</span> </label> </div> <script src="function.js"></script> </body> </html> |
style.css
Now create a CSS file named ‘style.css‘ and put these codes given here.
|
1 2 3 4 5 6 7 8 9 10 11 12 13 14 15 16 17 18 19 20 21 22 23 24 25 26 27 28 29 30 31 32 33 34 35 36 37 38 39 40 41 42 43 44 45 46 47 48 49 50 51 52 53 54 55 56 57 58 59 60 61 62 63 64 65 66 67 68 69 70 71 72 73 74 75 76 77 |
html { box-sizing: border-box; height: 100%; font-size: 10px; } *, *::before, *::after { box-sizing: inherit; } body { display: flex; align-items: center; justify-content: center; min-height: 100vh; color: #0f273d; font-family: 'Lato', sans-serif; } h3 { font-size: 2.5rem; font-weight: bold; } .swappy-radios label { display: block; position: relative; padding-left: 4rem; margin-bottom: 1.5rem; cursor: pointer; font-size: 2rem; -webkit-user-select: none; -moz-user-select: none; -ms-user-select: none; user-select: none; color: #555; } .swappy-radios label:hover input ~ .radio { opacity: 0.8; } .swappy-radios input { position: absolute; opacity: 0; cursor: pointer; height: 0; width: 0; } .swappy-radios input:checked ~ span { color: #ff4646; transition: color .5s; } .swappy-radios input:checked ~ .radio { background-color: #ff4646; opacity: 1 !important; } .swappy-radios input:checked ~ .radio::after { opacity: 1; } .swappy-radios .radio { position: absolute; top: 0; left: 0; height: 2.5rem; width: 2.5rem; background: #c9ded6; } .swappy-radios .radio::after { display: block; content: ''; position: absolute; opacity: 0; top: 0.75rem; left: 0.75rem; width: 1rem; height: 1rem; background: #fff; } |
function.js
The last step, create a JavaScript file named ‘function.js‘ and put the codes.
|
1 2 3 4 5 6 7 8 9 10 11 12 13 14 15 16 17 18 19 20 21 22 23 24 25 26 27 28 29 30 31 32 33 34 35 36 37 38 39 40 41 42 43 44 45 46 47 48 49 50 51 52 53 54 55 56 57 58 59 60 61 62 63 64 65 66 67 68 69 70 71 72 73 74 75 76 77 78 79 80 81 82 83 84 85 86 87 88 89 90 91 92 93 94 95 96 97 98 99 100 101 102 103 104 105 106 |
let currentValue = 1; const timeout = 0.75; const radios = document.querySelectorAll('.swappy-radios input'); const fakeRadios = document.querySelectorAll('.swappy-radios .radio'); const firstRadioY = document.querySelector('.swappy-radios label:nth-of-type(1) .radio').getBoundingClientRect().y; const secondRadioY = document.querySelector('.swappy-radios label:nth-of-type(2) .radio').getBoundingClientRect().y; const indicitiveDistance = secondRadioY - firstRadioY; fakeRadios.forEach(function(radio) { radio.style.cssText = `transition: background 0s ${timeout}s;`; }); const css = `.radio::after {transition: opacity 0s ${timeout}s;}` const head = document.head; const style = document.createElement('style'); style.type = 'text/css'; style.appendChild(document.createTextNode(css)); head.appendChild(style); radios.forEach(function(radio, i) { radio.parentElement.setAttribute('data-index', i + 1); radio.addEventListener('change', function() { temporarilyDisable(); removeStyles(); const nextValue = this.parentElement.dataset.index; const oldRadio = document.querySelector(`[data-index="${currentValue}"] .radio`); const newRadio = this.nextElementSibling; const oldRect = oldRadio.getBoundingClientRect(); const newRect = newRadio.getBoundingClientRect(); const yDiff = Math.abs(oldRect.y - newRect.y); const dirDown = oldRect.y - newRect.y > 0 ? true : false; const othersToMove = []; const lowEnd = Math.min(currentValue, nextValue); const highEnd = Math.max(currentValue, nextValue); const inBetweenies = range(lowEnd, highEnd, dirDown); let othersCss = ''; inBetweenies.map(option => { const staggerDelay = inBetweenies.length > 1 ? 0.1 / inBetweenies.length * option : 0; othersCss += ` [data-index="${option}"] .radio { animation: moveOthers ${timeout - staggerDelay}s ${staggerDelay}s; } `; }); const css = ` ${othersCss} [data-index="${currentValue}"] .radio { animation: moveIt ${timeout}s; } @keyframes moveIt { 0% { transform: translateX(0); } 33% { transform: translateX(-3rem) translateY(0); } 66% { transform: translateX(-3rem) translateY(${dirDown ? '-' : ''}${yDiff}px); } 100% { transform: translateX(0) translateY(${dirDown ? '-' : ''}${yDiff}px); } } @keyframes moveOthers { 0% { transform: translateY(0); } 33% { transform: translateY(0); } 66% { transform: translateY(${dirDown ? '' : '-'}${indicitiveDistance}px); } 100% { transform: translateY(${dirDown ? '' : '-'}${indicitiveDistance}px); } } `; appendStyles(css); currentValue = nextValue; }); }); function appendStyles(css) { const head = document.head; const style = document.createElement('style'); style.type = 'text/css'; style.id = 'swappy-radio-styles'; style.appendChild(document.createTextNode(css)); head.appendChild(style); } function removeStyles() { const node = document.getElementById('swappy-radio-styles'); if (node && node.parentNode) { node.parentNode.removeChild(node); } } function range(start, end, dirDown) { let extra = 1; if (dirDown) { extra = 0; } return [...Array(end - start).keys()].map(v => start + v + extra); } function temporarilyDisable() { radios.forEach((item) => { item.setAttribute('disabled', true); setTimeout(() => { item.removeAttribute('disabled'); }, timeout * 1000); }); } |
That’s It. Now you have successfully created Swappy Radio Buttons With CSS and JavaScript, Radio Input Animation. If you have any doubt or question comment down below.
Thanks For Visiting, Keep Visiting.


