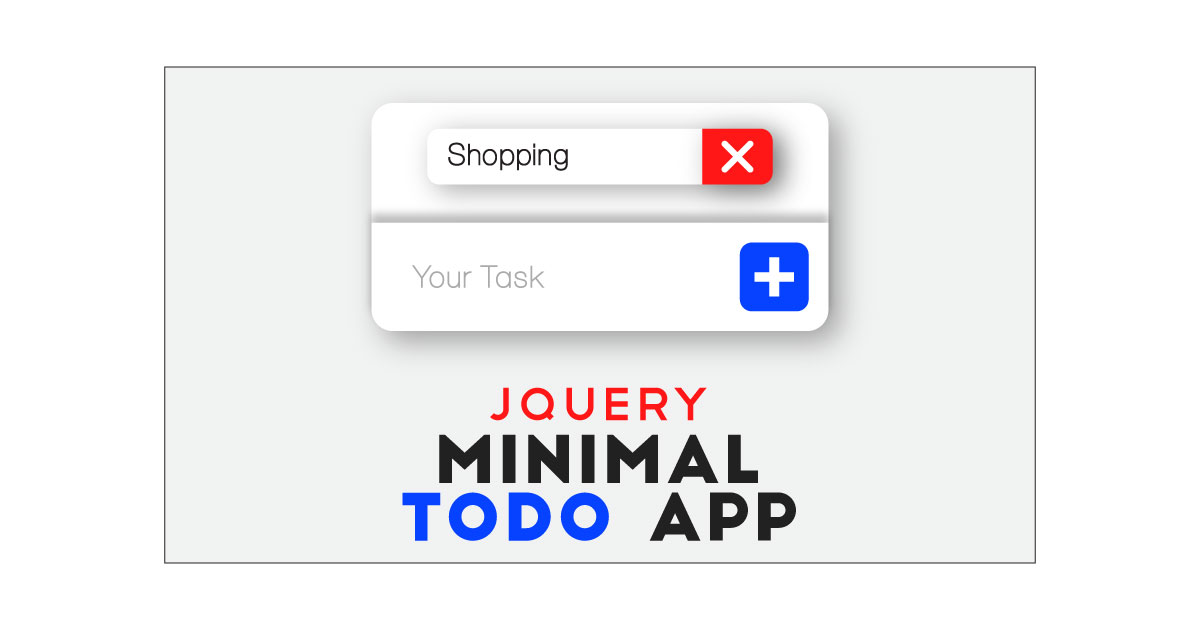
How we can create a flat to do list app with minimal design? Solution: See this Minimal To Do App Using jQuery and CSS, To-Do List Program.
Previously I have shared a JS to do list program, but this one has a minimal design and it is based on jQuery. Basically, to-do is a task management app or program to help you to stay organized and managed your day-to-day. You can add items that you have to do in the whole day, after finishing those works you can simply remove that item from the list.
Today you will learn to create To Do List Program. Basically, there are 3 fields in the program. One field for show list, one is input for insert items, and a plus button to add. When you will type somethings and press the add button, then the item will add on the list and visible. And removing any items from the list, you have to hover on that item and there will a cross icon reveal you have to click that to remove. The whole layout has a minimal design and shadow combinations.
So, Today I am sharing Minimal To Do App Using jQuery and CSS. There I have used HTML and CSS to create and style the layout of the program, and jQuery for functioning. This program has not keycode function, if you want to add the feature you have to look up the previous program which I have mentioned above. You can use this program on your website or project.
If you are thinking now how this to do list app actually is, then see the preview given below.
Preview Of ToDo List Program
See this video preview to getting an idea of how this list program looks like.
Now you can see this program visually, also you can see it live by pressing the button given above. If you like this program, then get the source code of its.
You May Also Like:
- Image Comparison Slider
- Login and Registration Form
- jQuery UI Minimal Tabs
- Password Strength Checker
Minimal To Do App Using jQuery Source Code
Before sharing source code, let’s talk about it. First I have created the main div for visualizing task list with class name ‘container’. Inside the container div, I have placed another div, a div for notification, and a list for adding items dynamically. After that, I have created another div section with class name ‘footer‘ for placing the text input and add button.
Now using CSS I have placed all the items in the right place, as you can see in the preview. With CSS first I gave basic values like size, position, margin, etc to the elements. There I have used flex display command to organize the layout. For creating the animation effect I have used CSS @keyframe and transform command.
jQuery adding and removing the items according to the user’s actions. First, jQuery fetched elements and stored in variables, I have used JS if{} else{} statements to functioning. There are fewer lines of jQuery codes because it is a minimal program. Left all other things you will understand after getting the codes, I can’t explain all in writing.
For creating this program, you have to create 3 files. First file for HTML, second for CSS, and the third file for JavaScript. Follow the steps to creating this program without any error.
index.html
Create an HTML file named ‘index.html‘ and put these codes given below.
|
1 2 3 4 5 6 7 8 9 10 11 12 13 14 15 16 17 18 19 20 21 22 23 24 25 26 27 28 29 30 31 |
<!DOCTYPE html> <!-- Code By Webdevtrick ( https://webdevtrick.com ) --> <html lang="en" > <head> <meta charset="UTF-8"> <title>Minimal Todo App | Webdevtrick.com</title> <link href="https://fonts.googleapis.com/css?family=Poppins:300,400,500,600,700" rel="stylesheet"> <link rel="stylesheet" href="https://cdnjs.cloudflare.com/ajax/libs/normalize/5.0.0/normalize.min.css"> <link rel="stylesheet" href="style.css"> </head> <body> <div id="container"> <div id="tasks"> <div id="notification">Sorry, your task list is empty.</div> <ul id="tasksList"> </ul> </div> <div id="footer"> <input id="taskInput" type="text" placeholder="Your task"/> <button id="taskAdd">+</button> </div> </div> <script src='https://cdnjs.cloudflare.com/ajax/libs/jquery/3.1.1/jquery.min.js'></script> <script src="function.js"></script> </body> </html> |
style.css
Now create a CSS file named ‘style.css‘ and put these codes given here.
|
1 2 3 4 5 6 7 8 9 10 11 12 13 14 15 16 17 18 19 20 21 22 23 24 25 26 27 28 29 30 31 32 33 34 35 36 37 38 39 40 41 42 43 44 45 46 47 48 49 50 51 52 53 54 55 56 57 58 59 60 61 62 63 64 65 66 67 68 69 70 71 72 73 74 75 76 77 78 79 80 81 82 83 84 85 86 87 88 89 90 91 92 93 94 95 96 97 98 99 100 101 102 103 104 105 106 107 108 109 110 111 112 113 114 115 116 117 118 119 120 121 122 123 124 125 126 127 128 129 130 131 132 133 134 135 136 137 138 139 140 141 142 143 144 145 146 147 148 149 150 151 152 153 154 155 156 157 158 159 160 161 162 163 164 165 166 167 168 169 170 171 172 173 174 175 176 177 178 179 180 181 182 183 184 185 186 187 188 189 190 191 192 193 |
/* Code By Webdevtrick ( https://webdevtrick.com ) */ body { display: -webkit-box; display: flex; -webkit-box-align: center; align-items: center; -webkit-box-pack: center; justify-content: center; height: 100vh; background-color: #f0f0ff; font-family: "Poppins", sans-serif; } #container { display: -webkit-box; display: flex; -webkit-box-orient: vertical; -webkit-box-direction: normal; flex-direction: column; -webkit-box-align: stretch; align-items: stretch; width: 500px; background-color: #fafafa; padding: 0px; box-shadow: 0 20px 30px 0 rgba(1, 1, 1, 0.07); margin: 6rem 0; border-radius: 0.75rem; } #footer { display: -webkit-box; display: flex; -webkit-box-pack: center; justify-content: center; width: 100%; box-sizing: border-box; padding: 1.5rem; align-self: flex-start; text-transform: uppercase; box-shadow: 0 -10px 10px 0 rgba(1, 1, 1, 0.05); } #footer #taskAdd { -webkit-transition: all 0.3s ease-in-out; transition: all 0.3s ease-in-out; width: 3rem; height: 3rem; background: #3b44fb; color: white; text-align: center; font-size: 2rem; font-weight: 300; border-radius: 0.75rem; border: 0; outline: 0; will-change: transform; } #footer #taskAdd:hover { background: #050fe5; -webkit-transform: scale(0.95); transform: scale(0.95); } #footer #taskAdd:active { -webkit-transform: scale(0.9); transform: scale(0.9); } #footer input#taskInput { box-sizing: border-box; font-family: "Poppins", sans-serif; font-size: 1rem; background: transparent; width: calc(100% - 3rem - 5px); border: none; } #footer input#taskInput:focus { outline: 0; border-color: white; color: #0d0d0d; } #tasks { padding: 1.5rem 2rem; } #tasks #tasksList { list-style-type: none; padding-left: 0; } #tasks #tasksList li { -webkit-transition: all 0.3s ease-in-out; transition: all 0.3s ease-in-out; box-shadow: 0 20px 30px 0 rgba(1, 1, 1, 0.07); border-radius: 0.75rem; color: #0d0d0d; padding: 1.25rem; font-size: 1rem; font-weight: 600; letter-spacing: .03rem; -webkit-animation: fadeIn .5s linear; animation: fadeIn .5s linear; background-color: #fff; margin-bottom: 5px; position: relative; border-right: 0px solid lightgray; letter-spacing: -.015rem; will-change: transform; } #tasks #tasksList li:hover { border-right: 55px solid red; -webkit-transition: all 0.3s ease-in-out; transition: all 0.3s ease-in-out; -webkit-transform: scale(1.05); transform: scale(1.05); z-index: 20; box-shadow: 0 20px 30px 0 rgba(1, 1, 1, 0.2); } #tasks #tasksList li:hover .delete { right: -37px; color: white; } #tasks #tasksList li .delete { -webkit-transition: all 0.30s ease-in-out; transition: all 0.30s ease-in-out; position: absolute; color: transparent; background: none; border: none; outline: 0; line-height: .85rem; font-size: 1rem; } #tasks #tasksList li .delete:hover { opacity: .75; } #tasks #notification { padding-top: 1rem; text-align: center; color: gray; font-weight: 500; font-size: 1.25rem; } @-webkit-keyframes fadeIn { 0% { opacity: 0; margin-top: -50px; } 50% { opacity: 0; } 100% { opacity: 1; margin-top: 0px; } } @keyframes fadeIn { 0% { opacity: 0; margin-top: -50px; } 50% { opacity: 0; } 100% { opacity: 1; margin-top: 0px; } } @-webkit-keyframes fadeOut { 0% { opacity: 1; margin-top: 0px; } 50% { opacity: 0; } 100% { opacity: 0; margin-top: -50px; } } @keyframes fadeOut { 0% { opacity: 1; margin-top: 0px; } 50% { opacity: 0; } 100% { opacity: 0; margin-top: -50px; } } |
function.js
The final step, create a JavaScript file named ‘function.js’ and put the codes.
|
1 2 3 4 5 6 7 8 9 10 11 12 13 14 15 16 17 18 19 20 21 22 23 24 25 26 27 28 29 30 31 32 33 34 35 36 37 38 39 40 41 42 43 44 45 46 47 48 49 50 51 52 |
// Code By Webdevtrick ( https://webdevtrick.com ) $(function() { //Attaching DOM element to varibles var $tasksList = $("#tasksList"); var $taskInput = $("#taskInput"); var $notification = $("#notification"); //Counting amount of items in the list //To display or hide notification var displayNotification = function() { if(!$tasksList.children().length){ //$notification.css("display", "block"); $notification.fadeIn("fast"); } else { $notification.css("display", "none") } } //Attaching event handler to the add button $("#taskAdd").on("click", function() { //Returning false if the input is empty if(!$taskInput.val()) { return false; } //Appending li with the input value $tasksList.append("<li>" + $taskInput.val() + "<button class='delete'>✖</button></li>"); //Cleaning input after add event $taskInput.val(""); //Display/Hide Notification displayNotification(); //Attaching even handler to the delete button $(".delete").on("click", function() { //Assigning "this" to varible, as it doesn't //work correctly with setTimeout() function var $parent = $(this).parent(); //Displaying CSS animation $parent.css("animation", "fadeOut .3s linear"); //Timeout on remove function setTimeout(function(){ $parent.remove(); displayNotification(); }, 295); }) }) }); |
That’s It. Now you have successfully created Minimal To-Do App Using jQuery and CSS, To Do List Program. If you have any doubt or question comment down below.
Thanks For Visiting, Keep Visiting.


