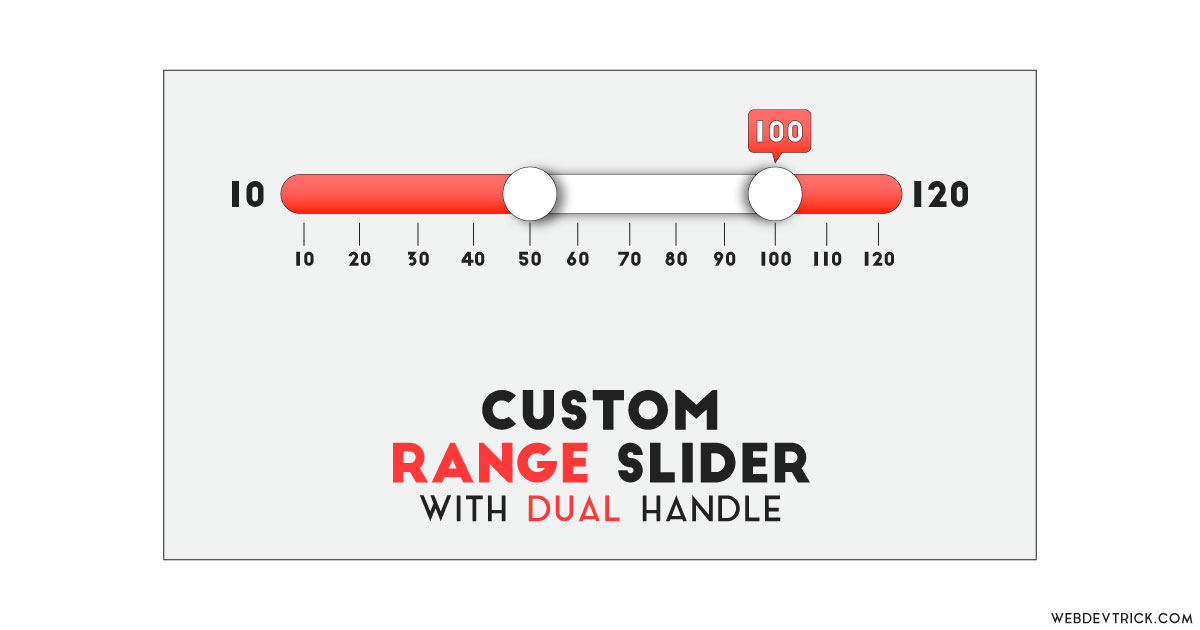
How we can customize a range input using HTML, CSS, JavaScript? Solution: See this Custom Range Slider Using CSS and JavaScript, <input type=”range”> with Dual Handle.
Previously I have shared some range slider programs, this is a customized and stylish version of range slider. Basically, the HTML <input type=”range”> tag defines a control for choosing an value by sliding like a slider control. The default range of this tag is 0 to 100, but we can put your numbers and values. By default, this has no styles but we can customize it using CSS and JavaScript.
Today you will learn to customize a <input type=”range”> tag and make it stylish. Basically, there is a range slider with 2 thumbs or handles and below the bar, there are numbers for showing values. On the right and left both sides have a minimum and a maximum number of values. Above the handles, there is a tooltip type element for showing the current or selected value.
So, today I am sharing Custom Range Slider Using CSS and JavaScript. There I have used HTML and CSS for creating the program, also JavaScript has little part in this program. This is a complete program and ready to use on a start and end values point. You can use this program on your websites like a budget selector or anything else.
If you are thinking now how this range input program actually is, then see the preview given below.
Preview Of Customized <input type=”range”>
See this video preview to getting an idea of how this range slider program looks like.
Now you can see this range program visually, also you can see it live by pressing the button given above. If you like this, then get the source code of its.
You May Also Like:
Custom Range Slider Using CSS and JavaScript Source Code
Before sharing source code, let’s talk about it. First I have created the main div with a class name ‘wrap’ and in the div tag, I have placed CSS variables using the inline-CSS method. Inside the main div, I have placed 2 input range sections with label and output, and a datalist tag to giving options below the bar. Also in the HTML file, I have linked other files like CSS and JavaScript.
Now using CSS I have placed all the elements in the right place, as you can see in the preview. With CSS I have done all the styles and features of this program. There are many CSS variables for the store and pass data easily. Also with CSS, I gave basic values like size, color, position, margin, padding, etc to the elements. And there most of the values I have passed using variables.
JavaScript handling here the tooltip values update on slides position change feature. There I have used JS addEventListener tag to fetch the user action and update data. Left all other things you will understand after getting the codes, I can’t explain all in writing. For creating this program you have to create 3 files. First file for HTML, second for CSS, and the third file for JavaScript.
Follow the steps to creating this program without any error.
index.html
Create an HTML file named ‘index.html‘ and put these codes given below.
|
1 2 3 4 5 6 7 8 9 10 11 12 13 14 15 16 17 18 19 20 21 22 23 24 25 26 27 28 29 30 31 32 33 34 35 36 37 38 39 40 |
<!DOCTYPE html> <!--Code By Webdevtrick ( https://webdevtrick.com )--> <html lang="en" > <head> <meta charset="UTF-8"> <title>Custom Range Slider | Webdevtrick.com</title> <script src="https://cdnjs.cloudflare.com/ajax/libs/prefixfree/1.0.7/prefixfree.min.js"></script> <link href="https://fonts.googleapis.com/css?family=Quicksand:300,600&display=swap" rel="stylesheet"> <link rel="stylesheet" href="./style.css"> </head> <body> <div class="wrap" role="group" aria-label="multi thumb slider with ruler" style="--a: 2; --b: 4; --min: 0; --max: 9; --lbl-a: 20; --lbl-b: 40;"> <label class="sr-only" for="a">Value A:</label> <input id="a" type="range" min="0" max="9" value="2" aria-valuetext="20" list="l"/> <output for="a" aria-hidden="true"></output> <output for="a" aria-hidden="true"></output> <output for="a" aria-hidden="true"></output> <label class="sr-only" for="a">Value B:</label> <input id="b" type="range" min="0" max="9" value="4" aria-valuetext="40" list="l"/> <output for="b" aria-hidden="true"></output> <output for="b" aria-hidden="true"></output> <output for="b" aria-hidden="true"></output> <datalist id="l"> <option value="0" label="0">0</option> <option value="1" label="10">10</option> <option value="2" label="20">20</option> <option value="3" label="30">30</option> <option value="4" label="40">40</option> <option value="5" label="50">50</option> <option value="6" label="60">60</option> <option value="7" label="70">70</option> <option value="8" label="80">80</option> <option value="9" label="90">90</option> </datalist> </div> <script src="function.js"></script> </body> </html> |
style.css
Now create a CSS file named ‘style.css‘ and put these codes given here.
|
1 2 3 4 5 6 7 8 9 10 11 12 13 14 15 16 17 18 19 20 21 22 23 24 25 26 27 28 29 30 31 32 33 34 35 36 37 38 39 40 41 42 43 44 45 46 47 48 49 50 51 52 53 54 55 56 57 58 59 60 61 62 63 64 65 66 67 68 69 70 71 72 73 74 75 76 77 78 79 80 81 82 83 84 85 86 87 88 89 90 91 92 93 94 95 96 97 98 99 100 101 102 103 104 105 106 107 108 109 110 111 112 113 114 115 116 117 118 119 120 121 122 123 124 125 126 127 128 129 130 131 132 133 134 135 136 137 138 139 140 141 142 143 144 145 146 147 148 149 150 151 152 153 154 155 156 157 158 159 160 161 162 163 164 165 166 167 168 169 170 171 172 173 174 175 176 177 178 179 180 181 182 183 184 185 186 187 188 189 190 191 192 193 194 195 196 197 198 199 200 201 202 203 204 205 206 207 208 209 210 211 212 213 214 215 216 217 218 219 220 221 222 223 224 225 226 227 228 229 230 231 232 233 234 235 236 237 238 239 240 241 242 243 244 245 246 247 248 249 250 251 252 253 254 255 256 257 258 259 260 261 262 263 264 265 |
/* Code By Webdevtrick ( https://webdevtrick.com ) */ .wrap::before, .wrap::after, input[type='range'] { grid-column: 2; grid-row: 2; place-self: center; width: var(--track-w); pointer-events: none; } * { --hl: 0; --nothl: calc(1 - var(--hl)); margin: 0; padding: 0; background: none; font: inherit; } html { --i: var(--wide, 1); --j: var(--narr, 0); --notj: calc(1 - var(--j)); display: grid; place-content: center; overflow-x: hidden; height: 100vh; background: #ff4e4e; color: #fff; font: 300 1em/ 1.5 quicksand, trebuchet ms, sans-serif; } @media (min-width: 750px) { html { font-size: 1.25em; } } @media (max-width: 570px) { html { --wide: 0 ; } } @media (max-width: 440px) { html { --narr: 1 ; } } @media (max-width: 320px) { html { font-size: 0.75em; } } html:not(.js) output, html:not(.js) .wrap::after { visibility: hidden; } .wrap { --u: calc(var(--notj)*2.75rem + var(--j)*10vw); --n-cols: calc(var(--max) + 1); --middl-w: calc(var(--n-cols)*var(--u)); --label-w: calc(var(--i)*5rem); --track-w: calc(var(--middl-w) - var(--u) + 1.5rem); --m: calc(.5*(var(--a) + var(--b))); display: grid; grid-auto-flow: row dense; grid-template-rows: 3rem max-content 3rem; grid-template-columns: var(--label-w) var(--middl-w) var(--label-w); filter: brightness(0.8); } .wrap::before, .wrap::after { z-index: -1; height: 1rem; border-radius: 1rem; content: ""; } .wrap::before { box-shadow: 0 1px #fc7444; background: linear-gradient(#fc3b3b, #e60023); } .wrap::after { background: #ecebe9; --mask: linear-gradient(90deg, #fc3b3b calc(0.75rem + var(--a)*var(--u)), transparent 0), linear-gradient(90deg, #fc3b3b calc(0.75rem + var(--b)*var(--u)), transparent 0); -webkit-mask: var(--mask); -webkit-mask-composite: xor; mask: var(--mask); mask-composite: exclude; } .wrap:focus-within { filter: none; } .sr-only { position: absolute; -webkit-clip-path: inset(50%); clip-path: inset(50%); } input[type='range'] { min-height: 2.25rem; height: 1.5rem; background: none; } input[type='range'], input[type='range']::-webkit-slider-thumb, input[type='range']::-webkit-slider-runnable-track { -webkit-appearance: none; } input[type='range']::-webkit-slider-runnable-track { border: none; padding: 0; width: 100%; height: 1rem; background: none; color: transparent; } input[type='range']::-moz-range-track { border: none; padding: 0; width: 100%; height: 1rem; background: none; color: transparent; } input[type='range']::-ms-track { border: none; padding: 0; width: 100%; height: 1rem; background: none; color: transparent; } input[type='range']::-ms-fill-lower { display: none; } input[type='range']::-webkit-slider-thumb { box-sizing: border-box; margin-top: calc(.5*(1rem - 1.5rem)); border: none; width: 1.5rem; height: 1.5rem; border-radius: 50%; box-shadow: 0 1px 0.125em rgba(174, 114, 90, 0.5), 0 1px 0.25em rgba(174, 114, 90, 0.5); background: #eae9ea; transition: none; pointer-events: auto; cursor: pointer; } input[type='range']::-moz-range-thumb { box-sizing: border-box; margin-top: 0; border: none; width: 1.5rem; height: 1.5rem; border-radius: 50%; box-shadow: 0 1px 0.125em rgba(174, 114, 90, 0.5), 0 1px 0.25em rgba(174, 114, 90, 0.5); background: #eae9ea; transition: none; pointer-events: auto; cursor: pointer; } input[type='range']::-ms-thumb { box-sizing: border-box; margin-top: 0; border: none; width: 1.5rem; height: 1.5rem; border-radius: 50%; box-shadow: 0 1px 0.125em rgba(174, 114, 90, 0.5), 0 1px 0.25em rgba(174, 114, 90, 0.5); background: #eae9ea; transition: none; pointer-events: auto; cursor: pointer; } input[type='range'] + [for] { display: grid; justify-self: start; margin-left: calc(.5*var(--u)); padding-bottom: .75rem; transform: translate(calc(var(--c)*var(--u) - 50%)); } input[type='range'] + [for]::after { display: block; padding: .25em .75em; transform-origin: 50% 100%; transform: scale(var(--hl)); border-radius: .25em; box-shadow: inset 0 0 2px #ff7747, inset 0 0 .25em #bc3c0f, inset 0 0 .5em #cf3f10, 0 1px #fc7444; opacity: var(--hl); transition: .3s ease-out; transition-property: transform, opacity; } input[type='range'], input[type='range'] + [for] { grid-column: 2; } input[type='range']:focus { outline: solid 0 transparent; } input[type='range']:focus, input[type='range']:focus + [for] { --hl: 1 ; } output[for] { grid-row: 1; font-size: 1.25em; font-weight: 600; counter-reset: lbl var(--lbl); } output[for]:after { content: counter(lbl) " px"; } output[for] + output[for] { --k: var(--parity, 1); --notk: calc(1 - var(--k)); --sgnk: calc(1 - 2*var(--k)); grid-column: calc(2*var(--notk) + 1); align-self: center; justify-self: var(--parity, end); overflow: hidden; grid-row-end: span 3; opacity: calc(4*var(--sgnk)*(var(--c) - var(--m)) + 1); color: rgba(255, 255, 255, calc(var(--i))); } output[for]:nth-of-type(3n) { --parity: 0; } output[for='a'] { --c: var(--a); --lbl: var(--lbl-a) ; } output[for='b'] { --c: var(--b); --lbl: var(--lbl-b) ; } datalist { display: grid; grid-auto-flow: column; grid-row: 3; place-self: start stretch; width: var(--middl-w); } option { display: flex; flex-direction: column; justify-content: center; width: var(--u); font-size: var(--notj); text-align: center; } option::before { align-self: center; width: 4px; height: .75rem; box-shadow: inset -1px 0 1px #fc7777; background: #9b2f0b; content: ""; } option:not(:nth-child(3n + 1)) { color: rgba(255, 255, 255, var(--notj)); } |
function.js
The last step, create a JavaScript file named ‘function.js‘ and put the codes.
|
1 2 3 4 5 6 7 8 9 10 11 12 13 14 |
// Code By Webdevtrick ( https://webdevtrick.com ) document.documentElement.classList.add('js'); addEventListener('input', e => { let _t = e.target, _p = _t.parentNode, val = +_t.value, _o = _p.querySelector(`option[value='${val}']`), lbl = +_o.label; _t.setAttribute('aria-valuetext', lbl); _p.style.setProperty(`--${_t.id}`, val); _p.style.setProperty(`--lbl-${_t.id}`, lbl); }, false); |
That’s It. Now you have successfully created Custom Range Slider Using CSS and JavaScript, input type=”range” program customization. If you have any doubt or questions comment down below.
Thanks For Visiting, Keep Visiting.


its works fine in chrome , but no other browsers