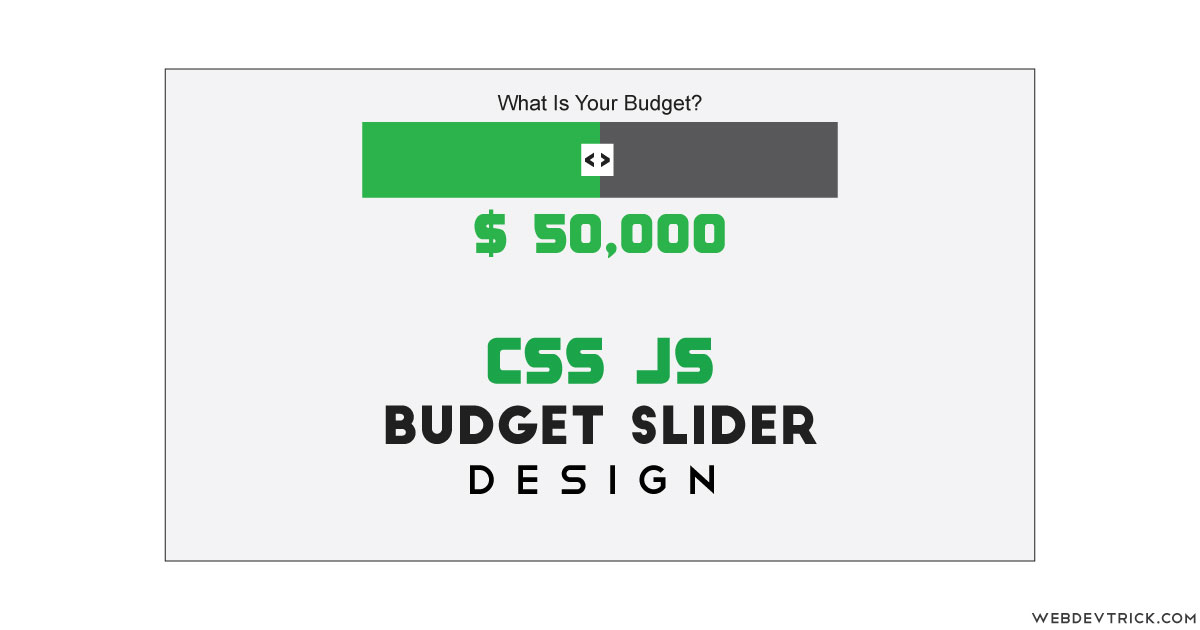
How we can create a price range slider or budget slider using HTML CSS JavaScript? Solution: See this CSS Budget Slider With jQuery Range Slide, Price Range Select Slider.
Previously I have shared price range slider, but this is something different from that because it is stylish and with good UI. Basically, a budget slider helps users set their budget with the help of sliding a range, they don’t have to put numbers manually. This slider contains a minimum and a maximum value you have to choose a number between those two amounts.
Today you will learn to create Price Range Select Slider with good UI design. Basically, there is a range slider with 0 to 1lakh amount range you can choose an amount between that, when you will slide the range slider then you can see the actual amount in the below of slider. You can click any part of the range bar choose change values in one click and also you can slide by holding the handles.
So, Today I am sharing CSS Budget Slider With jQuery Range Slide. There I have used CSS for the styling and jQuery for reading range value and changing the numbers dynamically. And there I have also used jQuery UI, as we know these two are JS library that’s why I am putting this post in the JavaScript category.
If you are thinking now how this budget range slider actually is, then see the preview given below.
Preview Of Price Range Select Slider
See this video preview to getting an idea of how this budget slider looks like.
Now you can see this visually, you also can see it live by pressing the button given above. If you like this, then get the source code of its.
You May Also Like:
- jQuery Multiple Checkbox Dropdown
- Expandable Search Bar CSS jQuery
- Random Text Color Contrast Generator
- JavaScript Table Filter or Search
CSS Budget Slider With jQuery Range Slide Source Code
Before sharing source code, let’s talk about it. First using HTML I have created some divs with ID and class names and placed a text input for showing the actual number. I have placed the external files in the HTML file likes jQuery UI CSS, jQuery, and jQuery UI JS CDN files. There are fewer codes of HTML because all features and styles are created using CSS JS.
Now using CSS I have placed all the elements in the right place, as you can see in the preview. I have created the shape by giving width and height values and put the dots up and downsides by placing ‘I‘ as content for after and before conditions. There I have used two google fonts, one of them helps to visualize the I like dots. There I have jQuery UI library (get), that’s why many things are done with just putting on functions and class names.
jQuery here handling the update amount feature. Basically, jQuery fetching the slide movement and updating the values according to slides values. The main functions like handle are powered by jQuery UI, we use libraries for easy work and save times. The numbers are the bottom is a text input that is changing with help of jQuery, you can also put numbers manually because it is a simple input.
Left all other things you will understand after getting the codes, I can’t explain all in writing. For creating this program you have to create 3 files for that. First for HTML, second for CSS, and the third for JavaScript. Follow the steps to creating this without any error.
index.html
Create an HTML file named ‘index.html‘ and put the codes given below.
|
1 2 3 4 5 6 7 8 9 10 11 12 13 14 15 16 17 18 19 20 21 22 23 24 25 26 |
<!DOCTYPE html> <!--Code By Webdevtrick ( https://webdevtrick.com )--> <html lang="en" > <head> <meta charset="UTF-8"> <title>Budget Range Slider | Webdevtrick.com</title> <link rel='stylesheet' href='http://ajax.googleapis.com/ajax/libs/jqueryui/1.11.2/themes/smoothness/jquery-ui.css'> <link rel="stylesheet" href="style.css"> </head> <body> <section id="content"> <h1>What is your budget?</h1> <div class="cube"> <div class="a"></div> <div id="slider-range-min"></div> </div> <input type="text" id="amount" /> </section> <script src='http://cdnjs.cloudflare.com/ajax/libs/jquery/2.1.3/jquery.min.js'></script> <script src='http://ajax.googleapis.com/ajax/libs/jqueryui/1.11.2/jquery-ui.min.js'></script> <script src="function.js"></script> </body> </html> |
style.css
Now create a CSS file named ‘style.css‘ and put the codes given here.
|
1 2 3 4 5 6 7 8 9 10 11 12 13 14 15 16 17 18 19 20 21 22 23 24 25 26 27 28 29 30 31 32 33 34 35 36 37 38 39 40 41 42 43 44 45 46 47 48 49 50 51 52 53 54 55 56 57 58 59 60 61 62 63 64 65 66 67 68 69 70 71 72 73 74 75 76 77 78 79 80 81 82 83 84 85 86 87 88 89 90 91 92 93 94 95 96 97 98 99 100 101 102 103 104 105 106 107 108 109 110 111 112 113 114 115 116 117 118 119 120 121 122 123 124 125 |
/* Code By Webdevtrick ( https://webdevtrick.com ) */ @import url(https://fonts.googleapis.com/css?family=Anonymous+Pro); @import url(https://fonts.googleapis.com/css?family=Exo:300,800); * { margin:0px; padding:0px; } .cube { position:relative; width:500px; height:60px; margin:5rem auto; } .a { position:absolute; width:50%; height:100%; left:0px; background-color: #37dd37; } .a:before { content:''; position:absolute; top:0px; left:0px; width:500px; height:60px; } .a:before { background-color:rgba(0,0,0,0.05); } #slider-range-min { position:absolute; width: 94%; left:3%; top:27px; margin: 0px; z-index:999; } .ui-slider { height:5px; border:none; background:rgba(0,0,0,0.1); -webkit-box-shadow:0px 2px 2px rgba(255,255,255,0.25), inset 0px 1px 3px rgba(0,0,0,0.3); -moz-box-shadow: 0px 2px 2px rgba(255,255,255,0.25), inset 0px 1px 3px rgba(0,0,0,0.3); box-shadow: 0px 2px 2px rgba(255,255,255,0.25), inset 0px 1px 3px rgba(0,0,0,0.3); } .ui-slider:before, .ui-slider:after { content:'IIIIIIIIIII'; position:absolute; left:2px; width:100%; font-family: 'Source Sans Pro', sans-serif; font-size:1.2rem; font-weight:300; color:rgba(0,0,0,0.3); letter-spacing:41px; text-shadow:1px 1px 0px rgba(255,255,255,0.2); } .ui-slider:before { top:-1.4rem; } .ui-slider:after { bottom:-1.4rem; } .ui-slider-range {background:transparent;} .ui-slider .ui-slider-handle { top:-8px; width:26px; height:20px; margin-left:-15px; padding-left:4px; border:none; background:rgba(255,255,255,0.7); border-radius:2px; text-align:center; font-family: 'Anonymous Pro', sans-serif; font-size:1.2rem; line-height:20px; color:rgba(0,0,0,0.5); text-decoration:none; letter-spacing:3px; cursor:pointer; text-shadow:1px 1px 2px rgba(255,255,255,1); -webkit-box-shadow:1px 1px 8px rgba(0,0,0,0.3); -moz-box-shadow: 1px 1px 8px rgba(0,0,0,0.3); box-shadow: 1px 1px 8px rgba(0,0,0,0.3); } .ui-slider .ui-slider-handle:focus { outline:none; } h1 { font-size:2.7rem; font-family: exo; font-weight:200; color:rgba(0,0,0,0.6); text-shadow:1px 1px 0px rgba(255,255,255,0.3); } #amount { position:relative; display:inline-block; padding-bottom:5rem; text-align:center; font-family: 'Exo', sans-serif; font-weight:800; font-size:4rem; color:#37dd37; background:transparent; border:none; } #amount:focus {outline:none;} #content { -webkit-box-sizing:border-box; -moz-box-sizing: border-box; box-sizing: border-box; width:100%; height:100%; padding-top:5rem; text-align:center; } |
function.js
The final step, create a JavaScript file named ‘function.js‘ and put the codes.
|
1 2 3 4 5 6 7 8 9 10 11 12 13 14 15 |
// Code By Webdevtrick ( https://webdevtrick.com ) $(function() { $( "#slider-range-min" ).slider({ range: "min", value: 50, min: 0, max: 100, slide: function( event, ui ) { $( "#amount" ).val( "₹" + ui.value + ",000"); $(".a, .b, .c, .d").width(ui.value + "%"); } }); $(".ui-slider-handle").text("<>"); $( "#amount" ).val( "₹" + $( "#slider-range-min" ).slider( "value") + ",000"); }); |
That’s It. Now you have successfully created CSS Budget Slider With jQuery Range Slide, Price Range Select Slider Program. If you have any doubt or question comment down below.
Thanks For Visiting, Keep Visiting.


Can i select multiple ranges in this control ?