How we can create a navigation menu with cool design and animations? Solution: See this Animated Navigation Menu With Sub-Items, Responsive Navigation Design Program.
Previously I have shared some navigation programs, but this little different from others. Basically, The Navigation or HTML <nav> element represents the section of the page that provides navigation links. Common examples of navigation sections are menus, tables of contents, and indexes. And most of the websites have a navigation bar with important links like home, about, contact, etc.
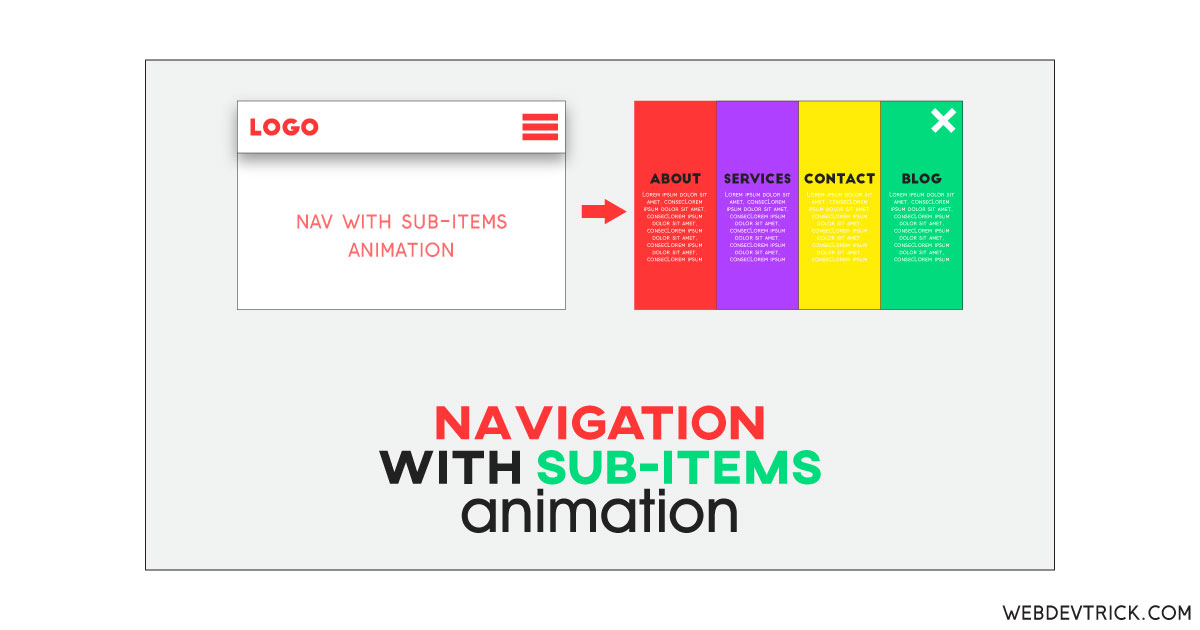
Today you will learn to create a responsive navigation menu bar. Basically, there is a navigation bar with a text LOGO on the left side, some icons and a hamburger icon on the right side. Except the menu icon all other contents are dummy, there is also a text on the body area. When you will click on the menu icon, 4 items will reveal with full-screen fill. The items are separated with different colors box, and label with item/s name. The nav link which has sub-menu items, there is an arrow-down icon for showing that. When you will click on the arrow-down icon, then the sub-menu items will reveal, and second click or toggle it will be closed.
So, Today I am sharing Animated Navigation Menu With Sub-Items. There I have used HTML to creating the layout, CSS for styling, and JavaScript for functioning. There is no jQuery or any other JS libraries, you can call it a pure HTML CSS JS program. I think this is cool and unique navigation animation, you can use it on your websites.
If you are thinking now how this navigation menu actually is, then see the preview given below.
Preview Of Responsive Navigation
See this video preview to getting an idea of how this navigation program looks like.
Now you can see this program visually, also you can see it live by pressing the button given above. If you like this, then get the source code of its.
You May Also Like:
- jQuery Form Validation
- Custom Range Slider
- Responsive Menu With Light/Dark Mode
- Full Page Scrolling Website
Animated Navigation Menu With Sub-Items Source Code
Before sharing source code, let’s talk about it. First I have created the nav sections using HTML <nav> tag, and placed all items inside it. After that, I have created an article section for the left page section. Inside the nav tag, I have placed a text as logo and put 3 SVG icons for dummy links. And placed an <i> tag for hamburger menu icon, and an HTML list using <ul> <li> tags for menu items.
Now using CSS I have placed all the items in the right place, as you can see in the preview. With CSS first I gave basic values like size, position, margin, padding, etc to all the elements. There I have used
flex display
display: flex command to create the layout. And used multiple @media queries for creating responsive design and fix size for every screen. I have used CSS
:before :after commands to create the icons like menu, close, and arrow-down.
JavaScript handling there the toggle reveal and close feature in this program. There I have fetched all elements using document.querySelectorAll command and stored in variables. After that, used if{} else{} statements to declared conditions, and classList. for add and remove class names dynamically. The same method and conditions applied for the menu and submenu both.
Left all other things you will understand after getting the codes, I can’t explain in writing. For creating this program you have to create 3 files. First file for HTML, second for CSS, and the third file for JavaScript. Follow the steps to creating this program without any error.
index.html
Create an HTML file named ‘index.html‘ and put these codes given here below.
|
1 2 3 4 5 6 7 8 9 10 11 12 13 14 15 16 17 18 19 20 21 22 23 24 25 26 27 28 29 30 31 32 33 34 35 36 37 38 39 40 41 42 43 44 45 46 47 48 49 50 51 52 53 54 55 56 |
<!DOCTYPE html> <!--Code By Webdevtrick ( https://webdevtrick.com )--> <html lang="en" > <head> <meta charset="UTF-8"> <title>Navigation Menu with Animations | Webdevtrick.com</title> <link rel="stylesheet" href="style.css"> </head> <body> <nav> <div class="menubar"> <a href="#" class="home">LOGO</a> <div class="icons"> <div class="secondary-icons"> <i class="icon-second"><img src="https://webdevtrick.com/wp-content/uploads/user-icon.svg"></i> <i class="icon-second"><img src="https://webdevtrick.com/wp-content/uploads/search-icon.svg"></i> <i class="icon-second"><img src="https://webdevtrick.com/wp-content/uploads/location-icon.svg"></i> </div> <i class="icon-menu"><span></span></i> </div> </div> <ul class="menu"> <li class="menu-link"><a href="#" class="text-item">About</a></li> <li class="menu-link sub"> <a href="#" class="text-item">Clients<span class="icon"></span></a> <ul class="submenu"> <li class="sub-item"><a href="#">Semrush</a></li> <li class="sub-item"><a href="#">Infosys</a></li> <li class="sub-item"><a href="#">Dell</a></li> </ul> </li> <li class="menu-link sub"> <a href="#" class="text-item">Services<span class="icon"></span></a> <ul class="submenu"> <li class="sub-item"><a href="#">Graphic Design</a></li> <li class="sub-item"><a href="#">Web Design</a></li> <li class="sub-item"><a href="#">App Development</a></li> </ul> </li> <li class="menu-link"><a href="#" class="text-item">Contact</a></li> </ul> </nav> <article> <h1>Navigation with Sub-Items using CSS Transitions and Animations</h1> </article> <script src="function.js"></script> </body> </html> |
style.css
Now create a CSS file named ‘style.css‘ and put these codes given here.
|
1 2 3 4 5 6 7 8 9 10 11 12 13 14 15 16 17 18 19 20 21 22 23 24 25 26 27 28 29 30 31 32 33 34 35 36 37 38 39 40 41 42 43 44 45 46 47 48 49 50 51 52 53 54 55 56 57 58 59 60 61 62 63 64 65 66 67 68 69 70 71 72 73 74 75 76 77 78 79 80 81 82 83 84 85 86 87 88 89 90 91 92 93 94 95 96 97 98 99 100 101 102 103 104 105 106 107 108 109 110 111 112 113 114 115 116 117 118 119 120 121 122 123 124 125 126 127 128 129 130 131 132 133 134 135 136 137 138 139 140 141 142 143 144 145 146 147 148 149 150 151 152 153 154 155 156 157 158 159 160 161 162 163 164 165 166 167 168 169 170 171 172 173 174 175 176 177 178 179 180 181 182 183 184 185 186 187 188 189 190 191 192 193 194 195 196 197 198 199 200 201 202 203 204 205 206 207 208 209 210 211 212 213 214 215 216 217 218 219 220 221 222 223 224 225 226 227 228 229 230 231 232 233 234 235 236 237 238 239 240 241 242 243 244 245 246 247 248 249 250 251 252 253 254 255 256 257 258 259 260 261 262 263 264 265 266 267 268 269 270 271 272 273 274 275 276 277 278 279 280 281 282 283 284 285 286 287 288 289 290 291 292 293 294 295 296 297 298 299 300 301 302 303 304 305 306 307 308 309 310 311 312 313 314 315 316 317 318 319 320 321 322 323 324 325 326 327 328 329 330 331 332 333 334 335 336 337 338 339 340 341 342 343 344 345 346 347 348 349 350 351 352 353 354 355 356 357 358 359 360 361 362 363 364 365 366 367 368 369 370 371 372 373 374 375 376 377 378 379 380 381 382 383 384 385 386 387 388 389 390 391 392 393 394 395 396 397 398 399 400 401 402 403 404 405 406 407 408 409 410 411 412 413 414 415 416 417 418 419 420 421 422 423 424 425 426 427 428 429 430 431 432 433 434 435 436 437 438 439 440 441 442 443 444 445 446 447 448 449 450 451 452 453 454 455 456 457 458 459 460 461 462 463 464 465 466 467 468 469 470 471 472 473 474 475 476 477 478 479 480 481 482 483 484 485 486 487 488 |
/* Code By Webdevtrick ( https://webdevtrick.com ) */ @import url("https://fonts.googleapis.com/css?family=Barlow:200,300,400,500,600,700,800,900&display=swap"); body { margin: 0; font-family: "Barlow", sans-serif; background-color: #f1f3f7; -webkit-tap-highlight-color: transparent; } ul { margin: 0; padding: 0; } ul li { list-style: none; } a { text-decoration: none; color: white; } nav .menubar { width: 100%; height: 80px; position: absolute; top: 0; display: flex; align-items: center; justify-content: space-between; padding: 0 40px; box-sizing: border-box; background-color: white; box-shadow: 0px 0px 20px -10px rgba(0, 0, 0, 0.3); /* Logo */ /* Icons */ } @media screen and (max-width: 767px) { nav .menubar { height: 60px; padding: 0 20px; } } nav .menubar .home { font-size: 20px; font-weight: 600; color: #ff5a5a; transition: all 0.4s ease; } nav .menubar .home:hover { opacity: 0.5; } nav .menubar .icons { display: flex; /* Icon Menu Hamburguer */ /* Secondary Icons */ } nav .menubar .icons .icon-menu { display: flex; width: 30px; height: 30px; z-index: 2; position: relative; display: flex; align-items: center; cursor: pointer; padding: 5px; /* Icon Close */ } nav .menubar .icons .icon-menu span { background-color: #ff5a5a; width: 30px; height: 3px; position: absolute; display: flex; justify-content: flex-end; transition: all 0.2s ease; right: 0; border-radius: 5px; } nav .menubar .icons .icon-menu span:before, nav .menubar .icons .icon-menu span:after { position: absolute; content: ""; width: 100%; height: 100%; background-color: #ff5a5a; border-radius: 5px; } nav .menubar .icons .icon-menu span:before { transform: translateY(-10px); transition: all 0.3s 0.1s ease; } nav .menubar .icons .icon-menu span:after { transform: translateY(10px); transition: all 0.3s 0.2s ease; } nav .menubar .icons .icon-menu:hover span { width: 30px; } nav .menubar .icons .icon-menu:hover span:before { width: 25px; } nav .menubar .icons .icon-menu:hover span:after { width: 20px; } nav .menubar .icons .icon-menu.icon-closed { justify-content: center; } nav .menubar .icons .icon-menu.icon-closed span { background-color: white; justify-content: center; width: 0px; right: initial; opacity: 0.5; transition: all 0.6s ease; } nav .menubar .icons .icon-menu.icon-closed span:before, nav .menubar .icons .icon-menu.icon-closed span:after { width: 30px; background-color: white; } nav .menubar .icons .icon-menu.icon-closed span:before { transform: rotate(45deg); } nav .menubar .icons .icon-menu.icon-closed span:after { transform: rotate(-45deg); } nav .menubar .icons .icon-menu.icon-closed:hover span { width: 0; opacity: 1; } @media screen and (max-width: 767px) { nav .menubar .icons .icon-menu.icon-closed:hover span:before { transform: rotate(45deg); } nav .menubar .icons .icon-menu.icon-closed:hover span:after { transform: rotate(-45deg); } } nav .menubar .icons .secondary-icons { display: flex; flex-wrap: wrap; } nav .menubar .icons .secondary-icons .icon-second { width: 30px; height: 30px; margin: 0 10px; cursor: pointer; transition: all 0.3s ease; padding: 5px; } @media screen and (max-width: 767px) { nav .menubar .icons .secondary-icons .icon-second { margin: 0 5px; } } nav .menubar .icons .secondary-icons .icon-second:last-child { margin-right: 30px; } @media screen and (max-width: 767px) { nav .menubar .icons .secondary-icons .icon-second:last-child { margin-right: 15px; } } nav .menubar .icons .secondary-icons .icon-second:hover { transform: translateY(-5px); opacity: 0.5; } @media screen and (max-width: 767px) { nav .menubar .icons .secondary-icons .icon-second:hover { transform: translateY(0px); opacity: 1; } } nav .menu { display: none; /* Open Menu */ /* Animation - Close */ } nav .menu.open { display: flex; z-index: 3; overflow: hidden; /* Menu Open - Main Link */ } nav .menu.open .menu-link { width: 25%; display: flex; justify-content: center; align-items: center; flex-direction: column; transition: all 0.4s ease-in-out; animation: menu 0.6s ease forwards; height: 100vh; position: relative; /* Main Link - text */ /* Sub Menu */ /* Menu Links - Hover */ } @keyframes menu { 0% { height: 0; transform: translatey(-50%); } 100% { height: 100vh; transform: translatey(0%); } } nav .menu.open .menu-link:nth-child(1) { background-color: #2d3561; animation-duration: 0.6s; } nav .menu.open .menu-link:nth-child(2) { background-color: #ff5a5a; animation-duration: 0.8s; } nav .menu.open .menu-link:nth-child(3) { background-color: #f3826f; animation-duration: 1s; } nav .menu.open .menu-link:nth-child(4) { background-color: #ffb961; animation-duration: 1.2s; } nav .menu.open .menu-link .text-item { color: white; text-transform: uppercase; font-weight: 800; font-size: 40px; opacity: 0.3; width: 100%; height: 20%; letter-spacing: 5px; transform: rotate(-90deg) translateX(0px); transition: all 0.4s 0.2s ease-in-out, letter-spacing 0.2s ease-in, opacity 0.2s ease-in; display: flex; justify-content: center; align-items: center; flex-direction: column; transform-origin: center; animation: text-in 0.6s ease; position: absolute; } @media screen and (max-width: 767px) { nav .menu.open .menu-link .text-item { transform: rotate(0deg); font-size: 30px; } } @keyframes text-in { 0% { opacity: 0; } 20% { opacity: 0; } 100% { opacity: 0.3; } } nav .menu.open .menu-link .text-item .icon { position: absolute; display: flex; width: 30px; height: 30px; opacity: 0; transform: translateY(0px); transition: all 0.4s ease-in-out; background-image: url("https://rafaelalucas91.github.io/assets/icons/white/icon-54.svg"); } @media screen and (max-width: 767px) { nav .menu.open .menu-link .text-item .icon { opacity: 0.5; transform: translateY(40px); } } nav .menu.open .menu-link .submenu { display: flex; flex-direction: column; justify-content: center; padding: 0 40px; box-sizing: border-box; opacity: 0; z-index: -1; transition: all 0.6s ease-in-out; height: 0%; width: 100%; background-color: rgba(255, 255, 255, 0.1); bottom: 0; transform: translateY(50%); position: absolute; } @media screen and (max-width: 767px) { nav .menu.open .menu-link .submenu { padding: 0 5%; } } nav .menu.open .menu-link .submenu .sub-item { display: none; margin: 10px 0; color: white; text-transform: uppercase; letter-spacing: 2px; font-size: 20px; font-weight: 600; position: relative; width: fit-content; cursor: pointer; padding: 5px 15px; } @media screen and (max-width: 767px) { nav .menu.open .menu-link .submenu .sub-item { font-size: 16px; } } nav .menu.open .menu-link .submenu .sub-item:after { content: ""; height: 0%; width: 3px; background-color: white; opacity: 0.3; position: absolute; top: 0; left: 0; transition: height 0.4s 0.3s ease, width 0.4s ease; } nav .menu.open .menu-link .submenu .sub-item:hover:after { width: 100%; height: 100%; transition: height 0.4s ease, width 0.4s 0.3s ease; } nav .menu.open .menu-link:hover { width: 50%; transition: all 0.4s ease-in-out; /* When Click to Open Sub Menu */ } nav .menu.open .menu-link:hover .text-item { height: 50%; transform: rotate(0deg) translateX(0px); font-size: 30px; opacity: 1; letter-spacing: 10px; } nav .menu.open .menu-link:hover .text-item .icon { opacity: 1; transform: translateY(40px); transition: all 0.3s 0.4s ease-in-out; } @media screen and (max-width: 767px) { nav .menu.open .menu-link:hover .text-item { width: 100%; font-size: 30px; opacity: 0.3; letter-spacing: 5px; } } @media screen and (max-width: 767px) { nav .menu.open .menu-link:hover.active { height: 80vh; } } nav .menu.open .menu-link:hover.active .text-item { transform: rotate(0deg) translateX(0px) translateY(-50%); transform-origin: center center; transition: all 0.6s ease-in-out; } @media screen and (max-width: 767px) { nav .menu.open .menu-link:hover.active .text-item { height: 20%; transform: translateY(-180%); } } nav .menu.open .menu-link:hover.active .text-item .icon { transition: all 0.3s ease-in-out; transform: translateY(40px) rotate(-180deg); } nav .menu.open .menu-link:hover.active .submenu { transform: translateY(0); height: 50%; z-index: 1; opacity: 1; bottom: 0; } @media screen and (max-width: 767px) { nav .menu.open .menu-link:hover.active .submenu { height: 70%; } } nav .menu.open .menu-link:hover.active .submenu .sub-item { display: flex; animation: submenu 1s ease forwards; z-index: 2; } @keyframes submenu { 0% { transform: translatex(50px) rotate(5-deg); opacity: 0; } 50% { transform: translatex(50px) rotate(-5deg); opacity: 0; } 100% { opacity: 1; transform: translatex(0px) rotate(0deg); } } nav .menu.open .menu-link:hover.active .submenu .sub-item:nth-child(1) { animation-duration: 1s; } nav .menu.open .menu-link:hover.active .submenu .sub-item:nth-child(2) { animation-duration: 1.2s; } nav .menu.open .menu-link:hover.active .submenu .sub-item:nth-child(3) { animation-duration: 1.4s; } @media screen and (max-width: 767px) { nav .menu.open .menu-link { width: 100%; height: 25%; animation: menu-mobile 0.6s ease forwards; transform: translatey(0%); right: 0; } @keyframes menu-mobile { 0% { transform: translateX(200%); } 100% { transform: translateX(0%); } } nav .menu.open .menu-link:hover { width: 100%; } } @media screen and (max-width: 767px) { nav .menu.open { height: 100vh; flex-direction: column; } } nav .menu.close .menu-link { animation: menu-close 1s ease forwards; } @keyframes menu-close { 0% { height: 100vh; } 100% { height: 0; } } nav .menu.close .menu-link .text-item { animation: text-out 0.6s ease forwards; } @keyframes text-out { 0% { opacity: 0.3; } 80% { opacity: 0; } 100% { opacity: 0; } } article { position: absolute; top: 50%; left: 50%; transform: translate(-50%, -50%); text-align: center; color: #ff5a5a; z-index: -1; opacity: 0.4; transition: all 0.4s ease; width: 80%; } article h1 { font-size: 20px; font-weight: 500; } article:hover { opacity: 1; } |
function.js
The final step, create a JavaScript file named ‘function.js‘ and put the codes.
|
1 2 3 4 5 6 7 8 9 10 11 12 13 14 15 16 17 18 19 20 21 22 23 24 25 26 27 28 29 30 31 32 33 34 |
// Code By Webdevtrick ( https://webdevtrick.com ) var iconMenu = document.querySelector('.icon-menu'), menu = document.querySelector('.menu'), menuLink = document.querySelectorAll('.menu-link.sub'); iconMenu.addEventListener('click', openMenu); menuLink.forEach(function(el) { el.addEventListener('click', openSubmenu); }); function openMenu() { if(menu.classList.contains('open')) { menu.classList.add('close'); iconMenu.classList.remove('icon-closed'); setTimeout(function(){ menu.classList.remove('open'); }, 1300); } else { menu.classList.remove('close'); menu.classList.add('open'); iconMenu.classList.add('icon-closed'); } } function openSubmenu(event) { if (event.currentTarget.classList.contains("active")) { event.currentTarget.classList.remove("active"); } else { event.currentTarget.classList.add("active"); } } |
That’s It. Now you have successfully created Animated Navigation Menu With Sub-Items, Responsive Navigation Design. If you have any doubt or question comment down below.
Thanks For Visiting, Keep Visiting.


